flowers

Nails, Tutorials

DIY Nail Decals

This week I'll be showing you all how to make your own custom nail decals. I know this isn't a super unique tutorial, but I figured I'd still make it because it's something that I enjoy doing, and maybe someone will learn something new from my tutorial. You never know, someone might stumble upon this post and it's the first time they've seen this technique! Or they could be like me and before doing a specific technique, they research the crap out of it, looking at multiple tutorials so they can pick and choose which techniques to use to fit their needs. The list of supplies for this project


Step 1
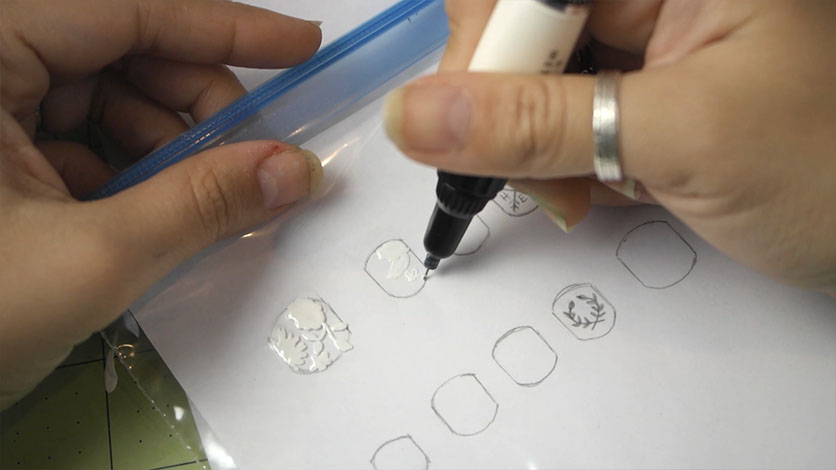
I eyeballed the size and shape of my nails and drew them out onto a piece of paper. If you do the same, you can draw your design inside of the nail like I did for two of these nails.

I wanted to paint a floral pattern on the rest of them, so on the right you can see some little  sketches I did to use as a reference. You could totally just pull up a reference from online, or a book, etc.


Step 2Cut the paper so it can fit inside of the bag and stick it inside.


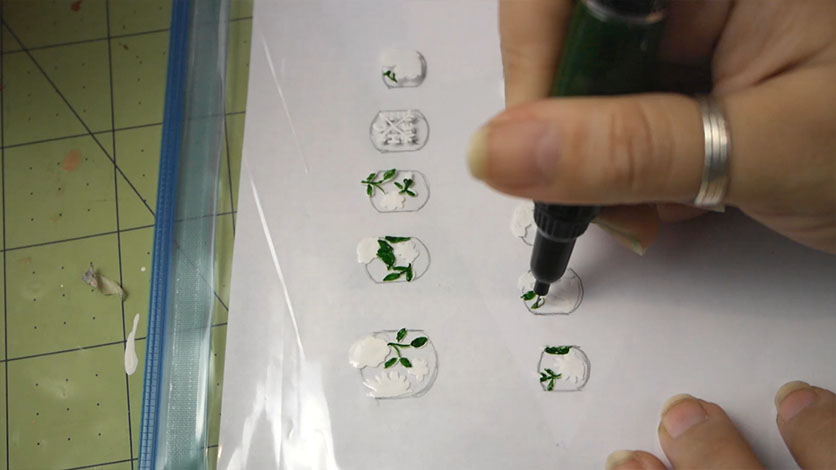
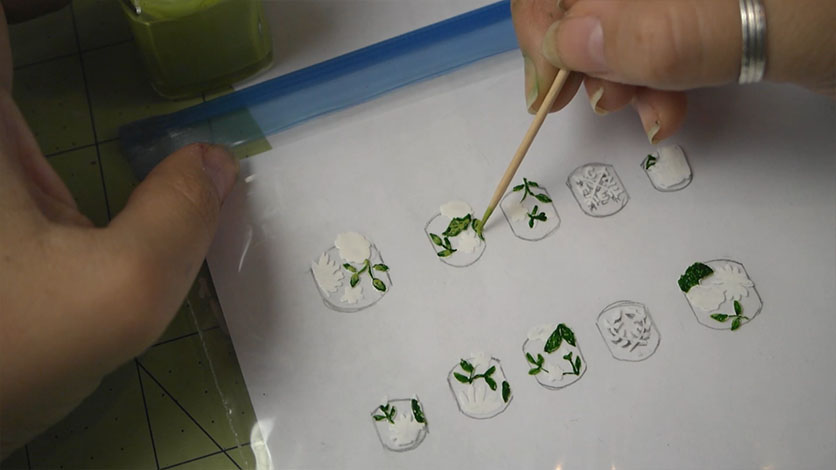
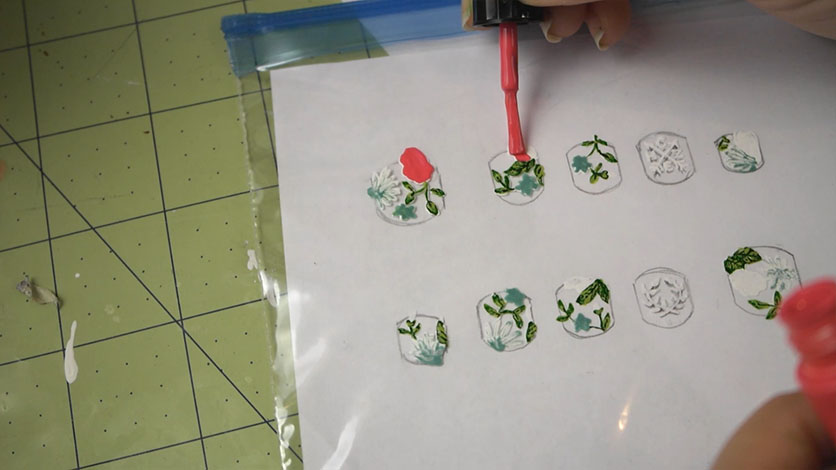
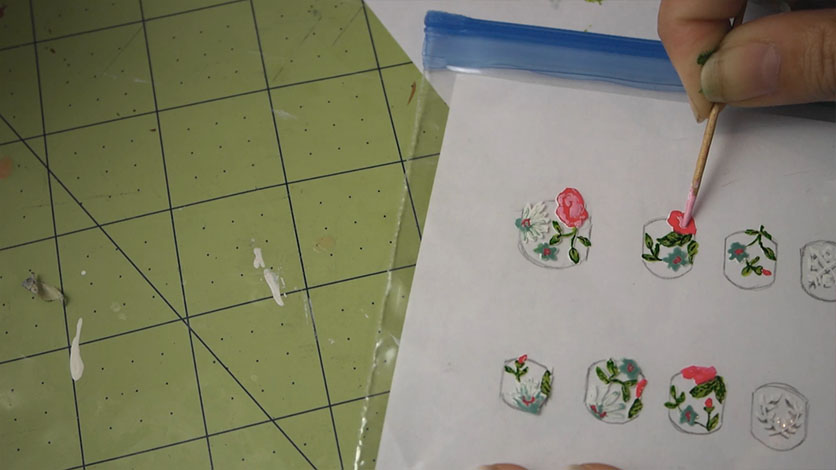
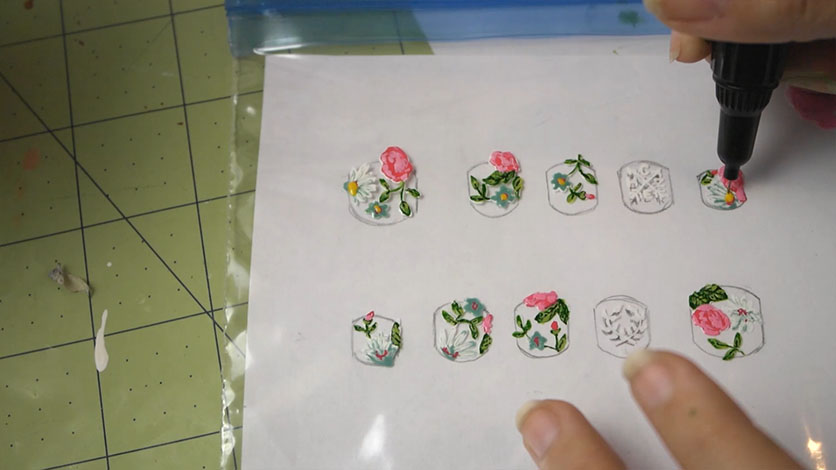
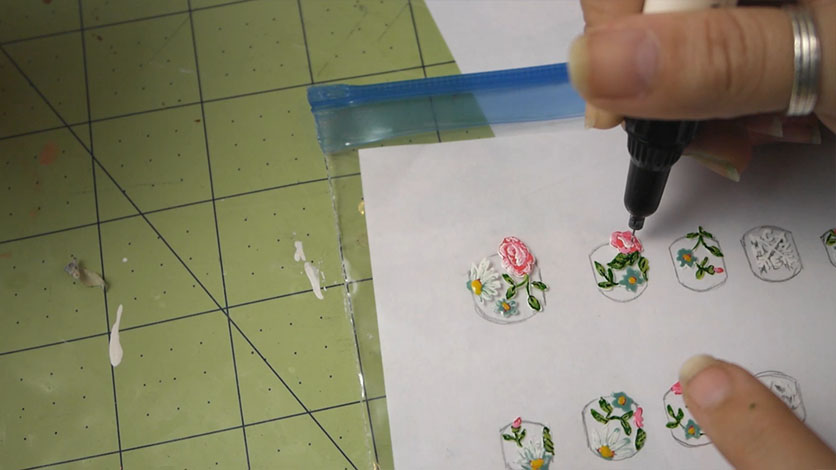
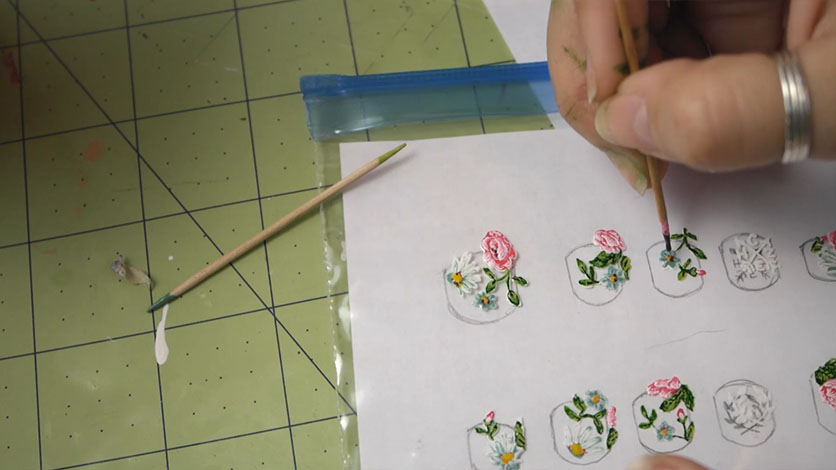
Here are the steps I did for this specific floral design.


Step 4Once the design was dry, I coated each one with some top coat.


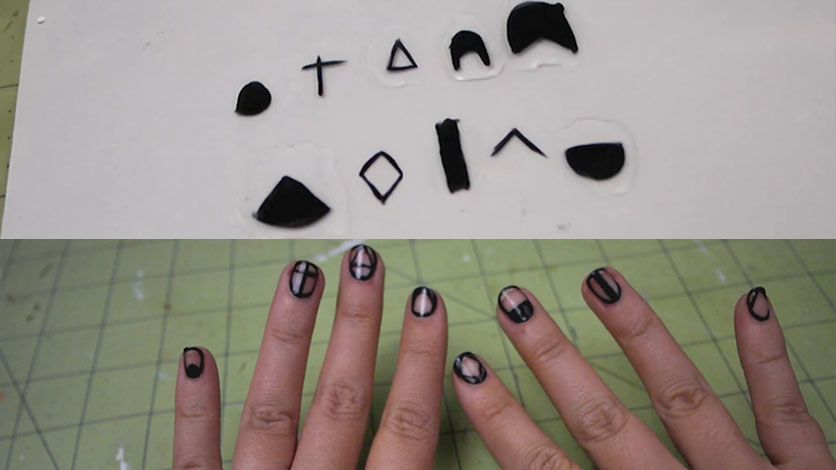
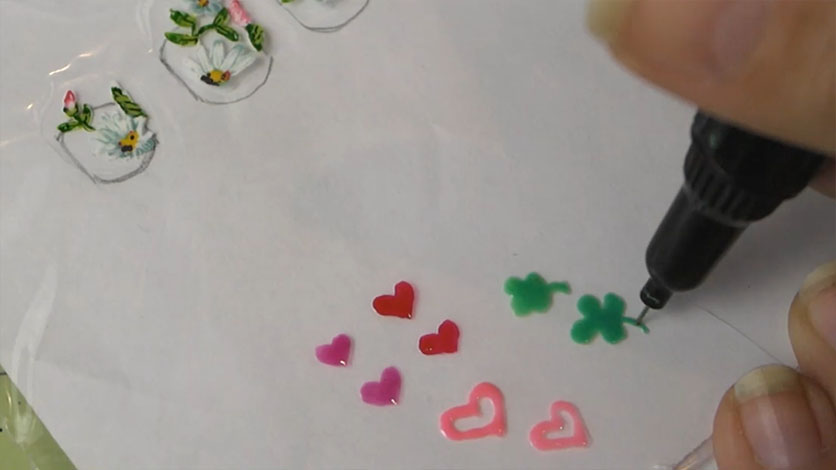
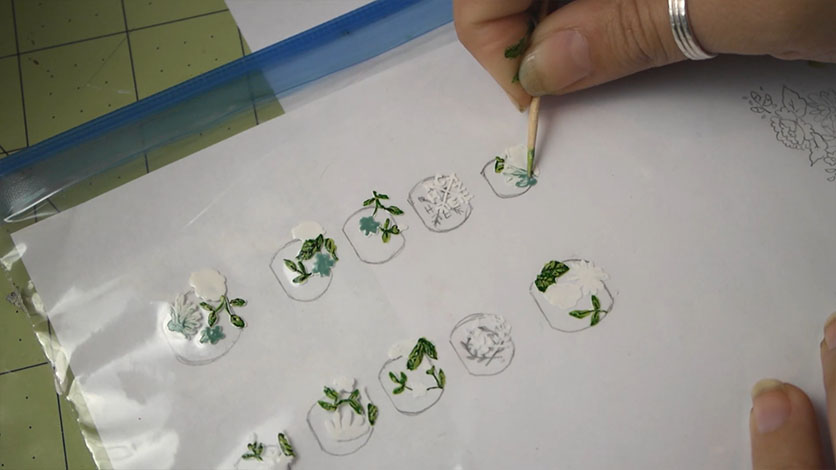
Here are some more examples of different decals you can make.


Step 5Remove the decals with your tweezers and, if needed, trim them to size. With mine I painted over the lines I sketched out so I had to trim quite a bit to fit them to my nails.


Step 6Paint your nails with your base coat, and then one coat of your background color, if you're using one. Let those dry completely, and then apply a layer of top coat, or as in my case, another layer of the background color.


Step 7Let it dry for about a minute or until it's tacky and then stick the decal on.


Step 8Gently pat/smooth it down. Repeat for all of your nails.


Step 9Finally apply another coat of topcoat, making sure to hit all the edges to seal them up.


Finished!And here they are all finished!


I hope you enjoyed this weeks tutorial! Stay tuned next week for more~


For the Home, Other, Tutorials

Flower Curtain Wall Decor

It's finally getting a bit chilly here and finally feeling like fall, so it's put me in the mood for all the autumn things. First things first, some decoration. My original intention was to make a wreath, but after getting my supplies home I changed my mind and decided to make some hanging wall decor instead. Here's how I did it!

Keep reading for a quick video recap below!


Supplies:01

02Cut all of the flowers apart.

03With the flowers I bought, the leaves were loose so had I superglue them in place.

05Find the center of a flower, squirt some hot glue in the middle and stick the end of a stem into it. Hold until the glue is hardened.

06Repeat until the strand of flowers is as long as you want. I made mine four flowers long. Repeat to make as many segments as you need for your branch size. I made nine.

07Tie a length of string onto the stick and then to the head of the top flower of one of the segments.

08Repeat until you've attached all of your segments. I tied mine about three to four inches apart.

09Here it is over my tv!

10My branch was pretty lightweight and adding the flowers didn't add much weight to it so I was able to just hammer two nails in the wall and rest the branch on those.

11If your branch is too heavy for that method, you could tie a piece of twine or yarn on each end of the branch and hang from a single nail like in the image above.

Hope you all enjoyed this project! I love it. I have a feeling like this piece is going to stay up on the wall for a while!

Gardening

My Misadventures in Gardening: Wedding Edition

feature022.jpg

Oh gosh, this is going to be a good one. So I'm currently planning my wedding, which will be at the end of March. I've been trying to figure out ways to help keep the cost down, and being an avid crafter I'm planning on doing a lot of diy (but hopefully still nice-looking) stuff. Surprisingly (to me anyway) a big expense would be flowers. In true fashion, I thought, "Psh, I could do that." And a little while later, I was anxiously awaiting my package of assorted flower bulbs from easytogrowbulbs.com that I was totally going to grow.

If you read my first gardening post, you learned that I'm absolutely horrible at growing things. So why did I think I could do this? I have this weird cycle where somehow I start believing that I have a green thumb. I go and try to grow plants and then inevitably I end up killing the poor things. It happens every time.

I just so happened to be researching the cost of flowers while I was in the beginning of this cycle and everything came together to form the perfect storm. I'm trying to be optimistic about my chances this time and I made sure to so a lot of research for these flowers so hopefully I'll finally break the cycle if not just for the wedding, for the rest of my life! Also, I totally sent a few backup bulbs to my mom and future mother-in-law because they're much better at this whole plant growing thing then I am. So if I fail, it all falls on their shoulders! All joking aside, if this does fail spectacularly, best case scenario, I'll have enough flowers to arrange a bouquet for myself and I'll just have to diy some different center pieces for the tables. At the moment I'm thinking paper flowers (if done right they can be quite beautiful). Worst case scenario I'll just have to buy some flowers and arrange my bouquet the day/night before.

But enough of all this silly back story, you've come for the good stuff, and here it is! My first, and main flower, the ranunculus:

SAMSUNG CSC

These things are so weird looking. SAMSUNG CSCI was scared of root rot while trying to germinate these suckers, and I read that you could soak them for 24 hours before planting, then after you plant them you begin to water after they start showing signs of growth.

SAMSUNG CSC

Oh my, they got quite big.SAMSUNG CSC Time to plant! But one problem. I had forgotten to pick up some rocks and from my basic research, I figured out you need to provide drainage in the bottom of the pot. I didn't feel like going back out during rush hour to get rocks so I did the next best thing; I turned to the internet. "I don't have rocks for the bottom of my pot! What do I do?!" I was surprised to learn that some people suggest using packing peanuts to help with the drainage in the bottom of their pots. Interesting! And guess who had recently received a package filled to the brim with those things?SAMSUNG CSCLooks like packing peanuts it is! SAMSUNG CSC

Oh god, I hope those sites I was looking at weren't joke sites and this is actually a thing that people actually do. SAMSUNG CSC Whelp, it's too late now anyway. Let's plant! So you're supposed to plant these with the tubers pointing down.SAMSUNG CSC I spaced them out evenly and covered with about an inch of soil.SAMSUNG CSCHere are my next flowers: watsonia- snow queen. SAMSUNG CSCThese required about four inches of soil on top. Fingers crossed!SAMSUNG CSC And the next flowers are: freesia- double white. Not pictured, me covering these with about an inch of soil.SAMSUNG CSC

For buying the amount of bulbs I did, they threw in a free pack of "adventure bulbs" to help encourage people to find our about/grow new flowers. These tiny onion looking bulbs I ended up getting are allium drumstick. We'll see how they go! SAMSUNG CSCHere are but a few of the freshly planted bulbs up on my credenza while they germinate. The plan is to eventually move them outside once they're growing well. (One side note; this is another post that was delayed a bit. I planted everything on the 2nd, so my next update for these guys will seem like they grew super fast when in reality they're normal bulbs with normal growing rates. Nothing super here!)

I sure hope this works out, how great would it be if my first real gardening success was growing flowers for my own wedding!