
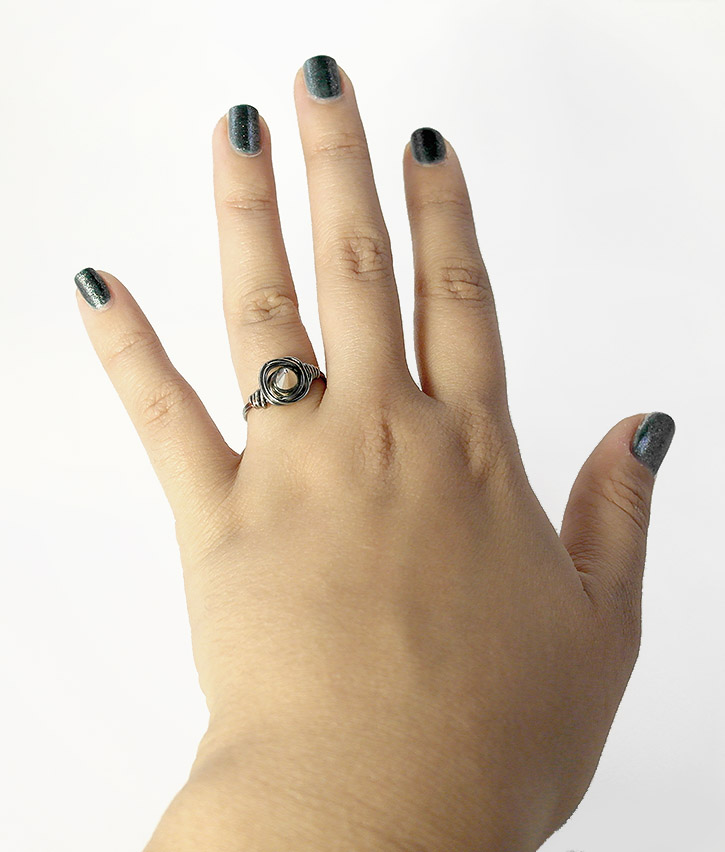
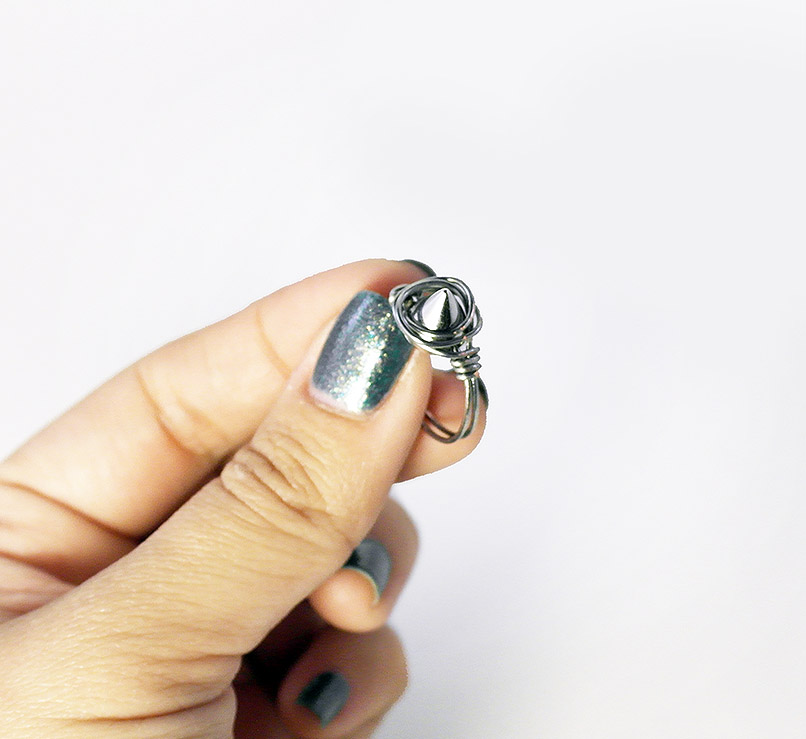
I just wanted to make a quick update letting you all know that I'm actually stocking my store again. I was inspired by animals with these new pieces I started making. I started calling it my Fauna Collection and I'll be adding more soon!
chezlin ·
chezlin ·
If you hadn't noticed, I've been in a crafting slump. The other day my younger sister showed me some earrings she wanted to purchase for prom but she didn't like the wooden beads on them. I guess my craft starved mind needed sustenance because before I knew what I was doing, I told her "I'll make you some!"
And I gathered my supplies...
And then decided I'd share the process with you all!

The materials: -feathers -jewelry findings -jewelry pliers -jump rings -spacers or beads -easily bendable wire -sturdy wire* -hoop template*
*These are optional - I made my own hoops because I couldn't find any big enough.

Here are the inspiration earrings. From Asos.

Mark three inches from the tip of the feather. See my earrings? Made those to test this process out :)

Cut on your mark.

After cutting them I stripped the barb about 1/4" from the end.

Cut about 3 inches off of your bendy wire.

Wrap the wire about the end of the feather. I got this technique from Corrine over at Craftovision(yaay, she's back!). Check out the video here to see how do do this.

Here they are, all wrapped up!

Here I took the sturdy wire and used the template to help shape it the way I wanted. Not pictured, I used my jewelry pliers to loop around one end of the wire.

I strung the feathers and spacers on and then looped the other end of the wire.

Connected with a jump ring.

Attached the earring finding and voila!
I sure hope they work for her! I enjoyed making these earrings so much that I ended up making a few other pairs that I'm going to put up in my Etsy store, so if you want to pick some up then you can head over there!
Also, these earrings are sold out!
chezlin ·
It's been a while, but I finally put some more items on my Etsy store. Go check them out!
Here are some of them:

Snow Owl

Creepy Eel

Butterfly

The Bite

Singing Bird
 Busy Bee
chezlin ·
In order to get myself back in the crafting groove I've been doing some quick and easy things like making simple jewelry and little amigurumi. When I finish my crochet project I'll post it here, but for now I have an awesome bracelet to talk about. Almost a month ago Etsy ran a "How-Tuesday" where Simone Tan (a.k.a Groundsel) explained how to make a sailor's knot bracelet. I actually saw this post a few days ago and as soon as I finished reading it I grabbed the first skein of yarn closest to me and started to knot. Here is the finished bracelet:

It's kind of small and skinny because I just used normal yarn. I wanted to make something chunkier so I headed to my local craft store and bought some thicker silver rope stuff and some even thicker cording. Here it is with the silver rope:

This one is my absolute favorite and I've been wearing it every day since I've made it. The silver rope makes it look more "fancy" so I can wear it when I'm being more dressy as well as just wearing it casually.

Here they are next to each other on me. I think this style of bracelet looks better larger. This brings us to the cording.

This stuff is really thick, and unfortunately I didn't get enough of it to make a bracelet so that's going to have to come later whenever I find the time to go buy more of this stuff. Luckily it's only like .29 cents a yard! I think I'll probably make a fabric bowl with this cording I have now. I've been itching to make one for a while.
Sailor's knot bracelet tutorial: Here!
Fabric bowl tutorial: Here!
Bedroom, For the Home, Kitchen
chezlin ·
So this post today is for two reasons. First and foremost, I made some kickin' rad one of a kind mugs. I got this idea thanks to craftster, roboarsonist. She used a ceramic paint pen by Pebeo called Porcelaine 150 and used it to draw some designs on a few mugs. Once I saw that I knew I had to try it. I went to Michaels and grabbed myself one pen and then to Goodwill to grab up some mugs and then went to town on them. Well, actually only two of them so far... and here they are!
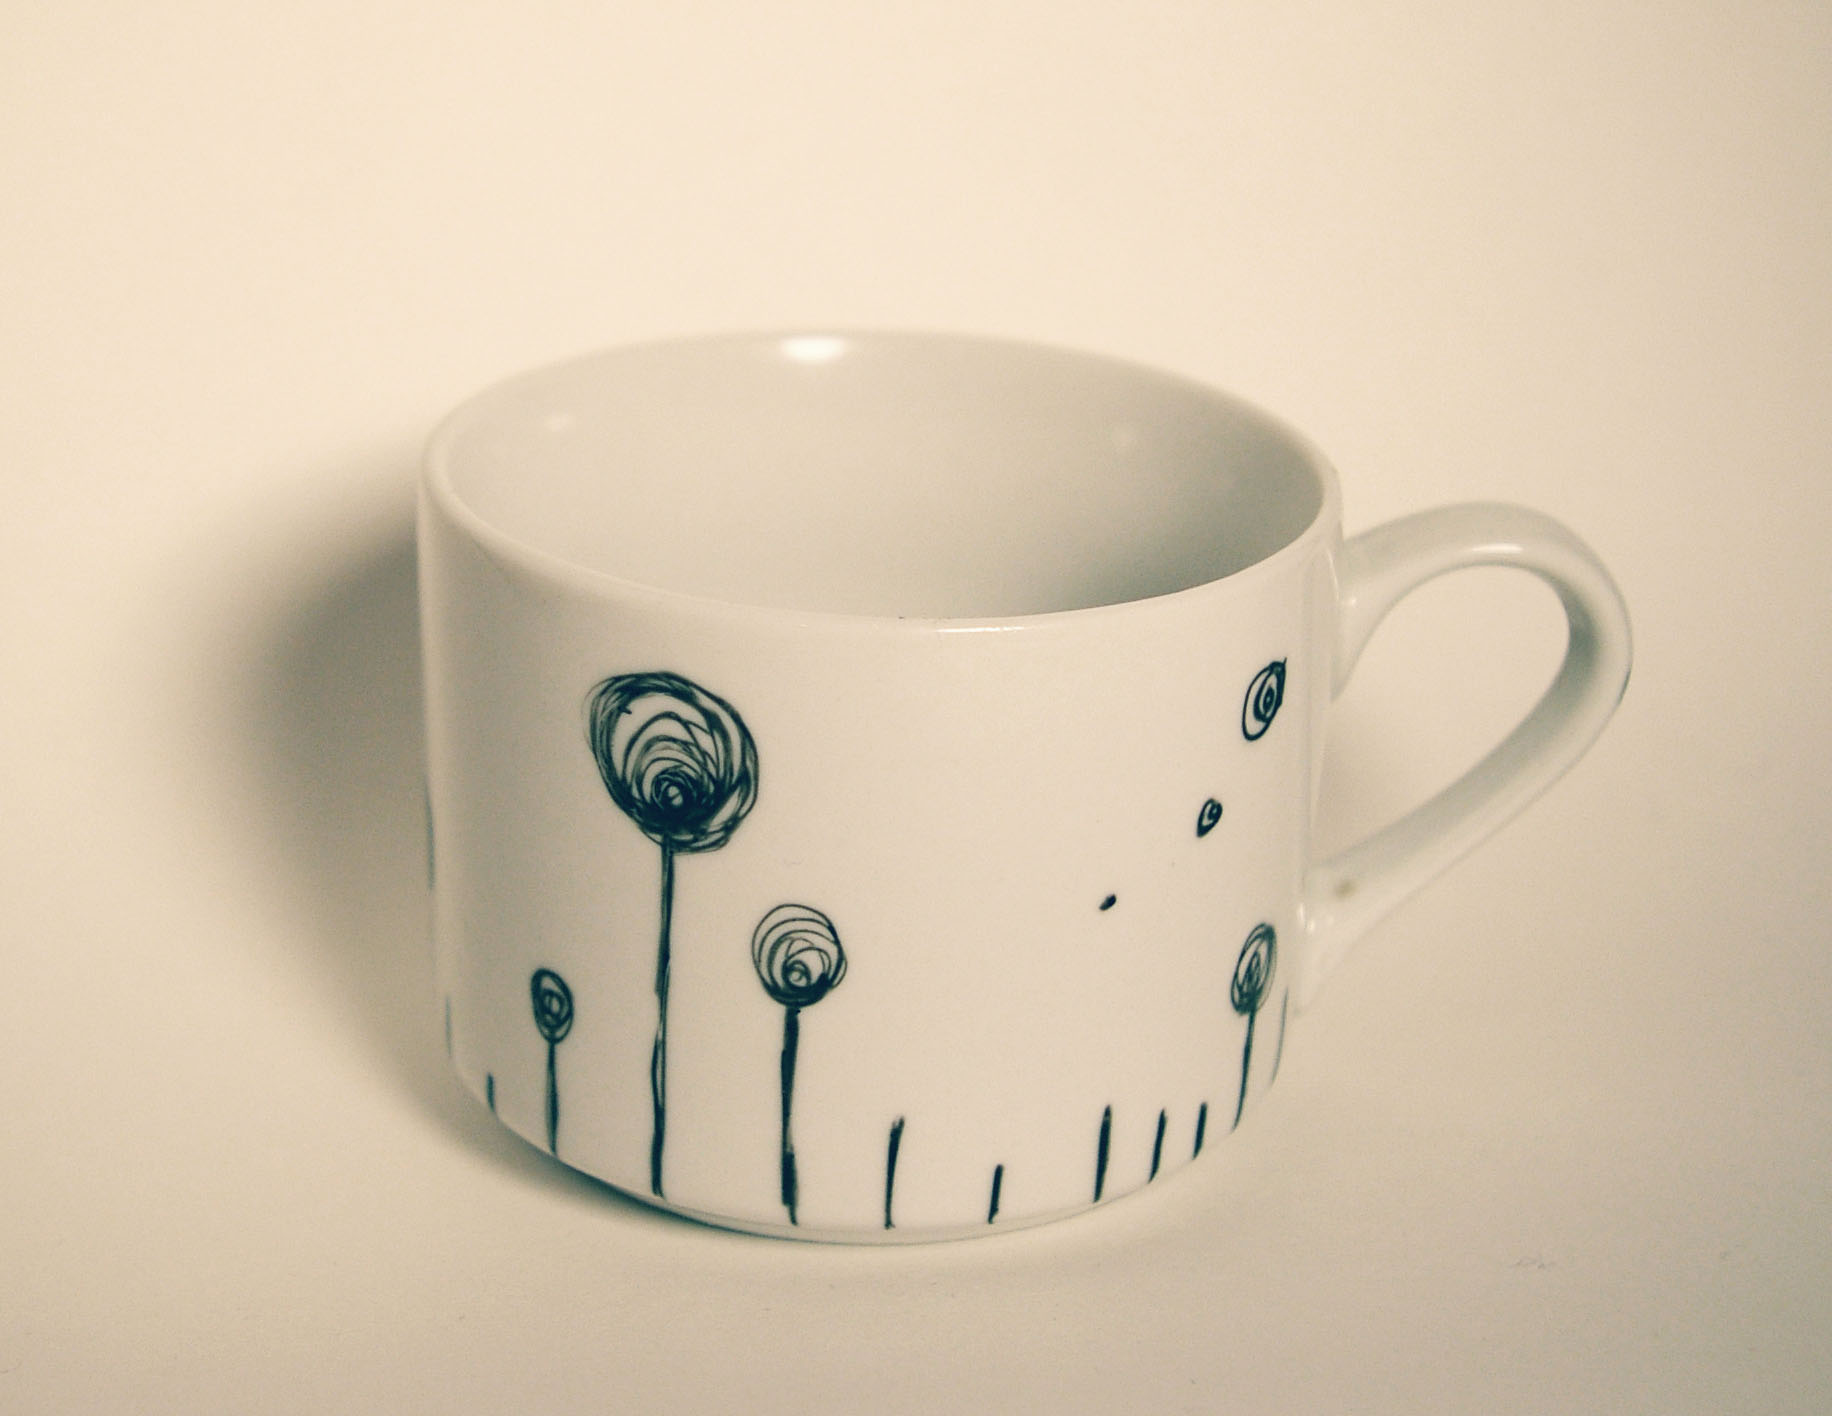
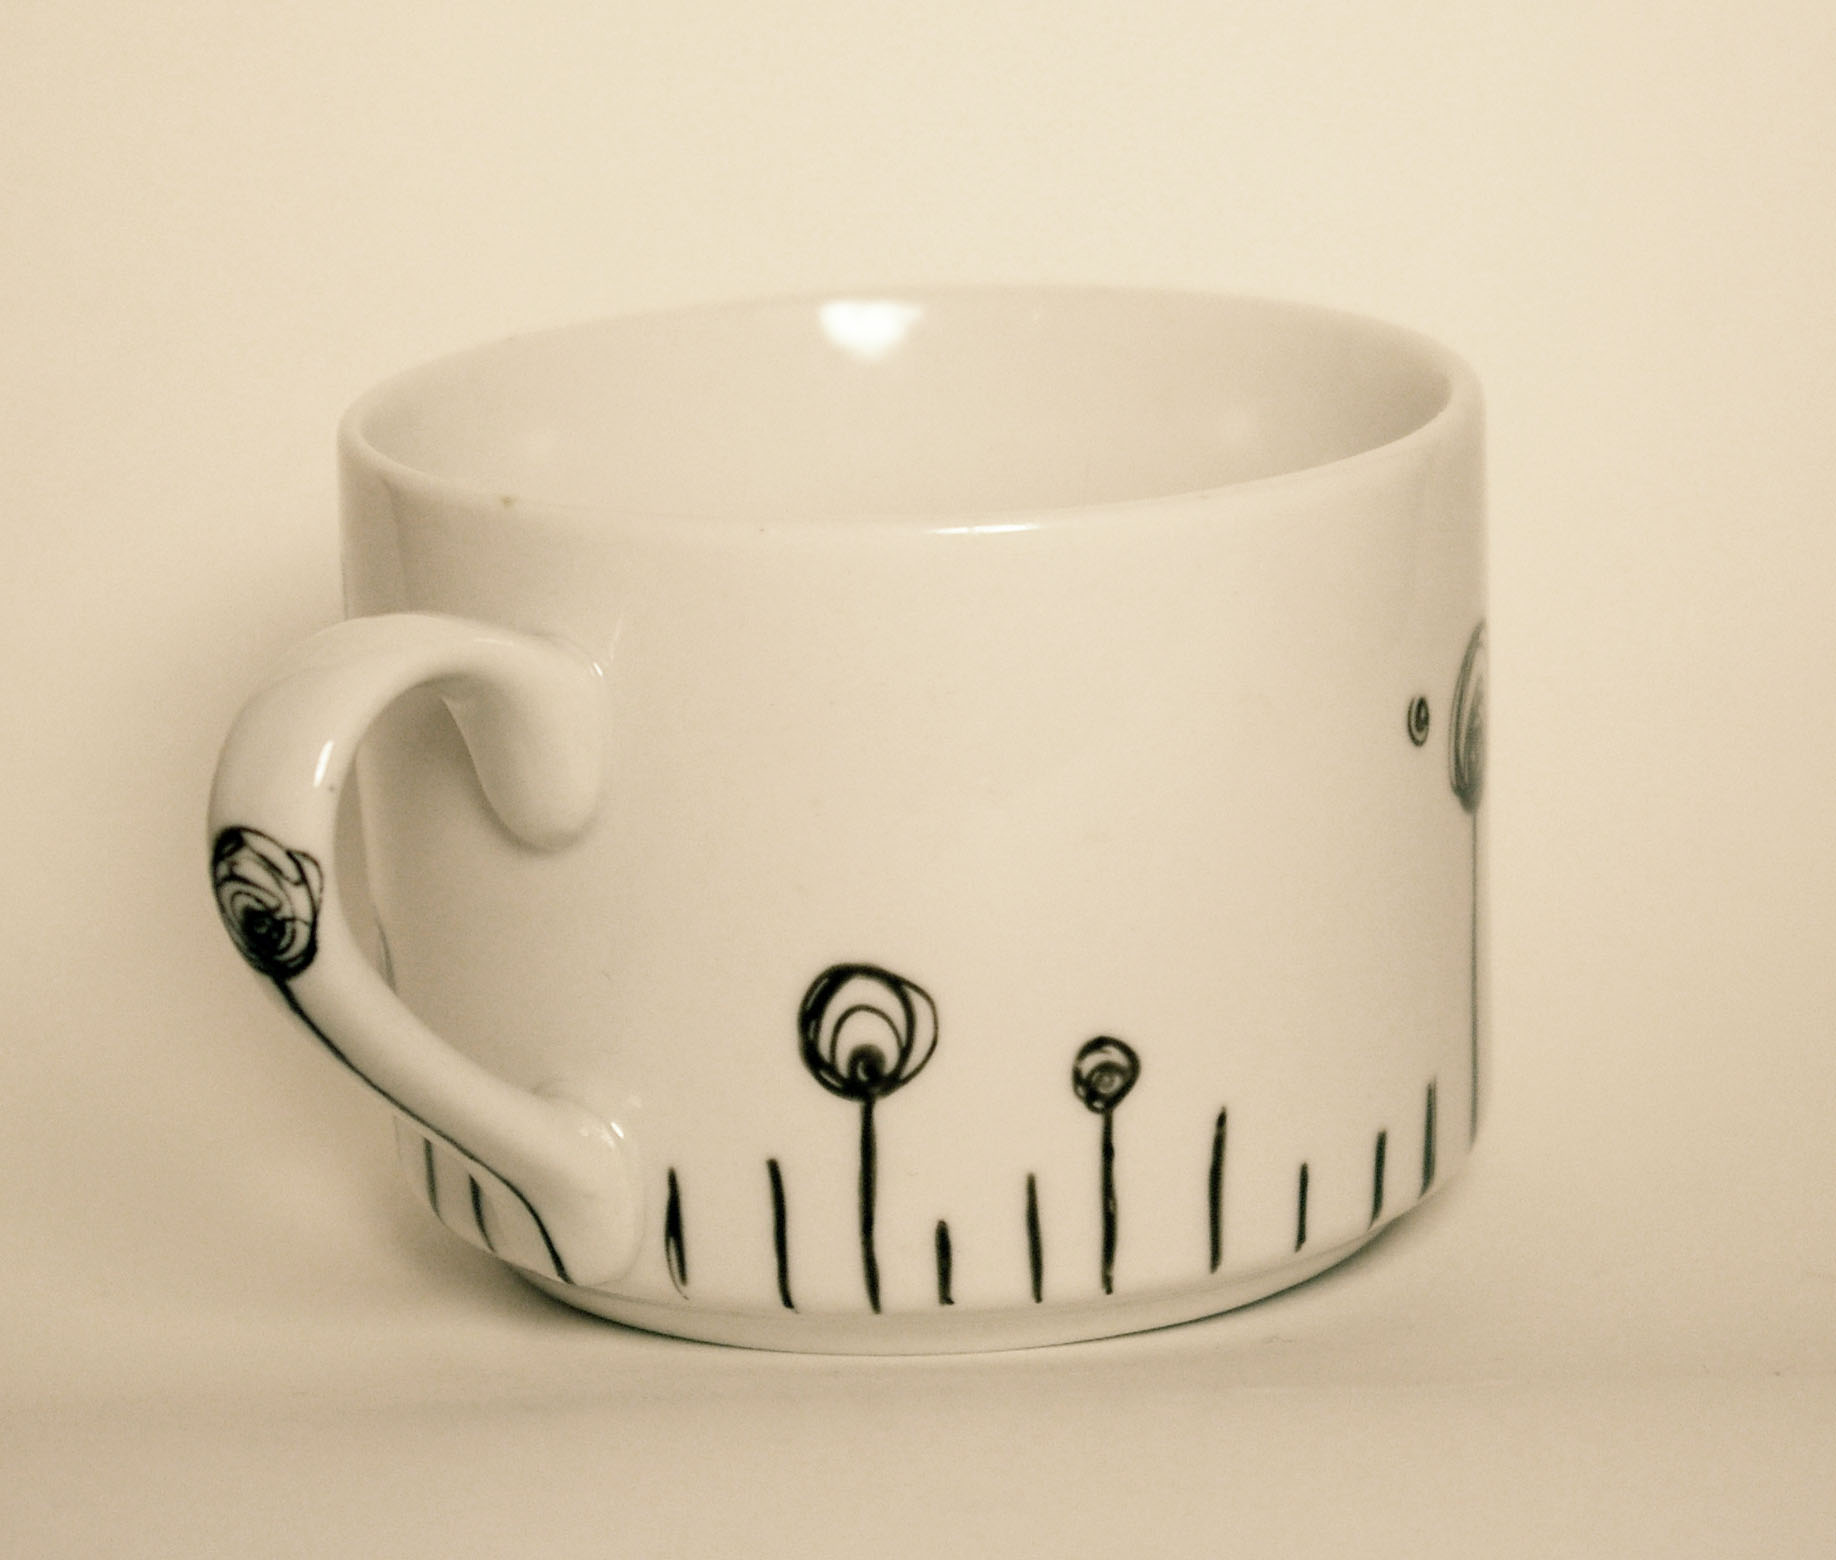
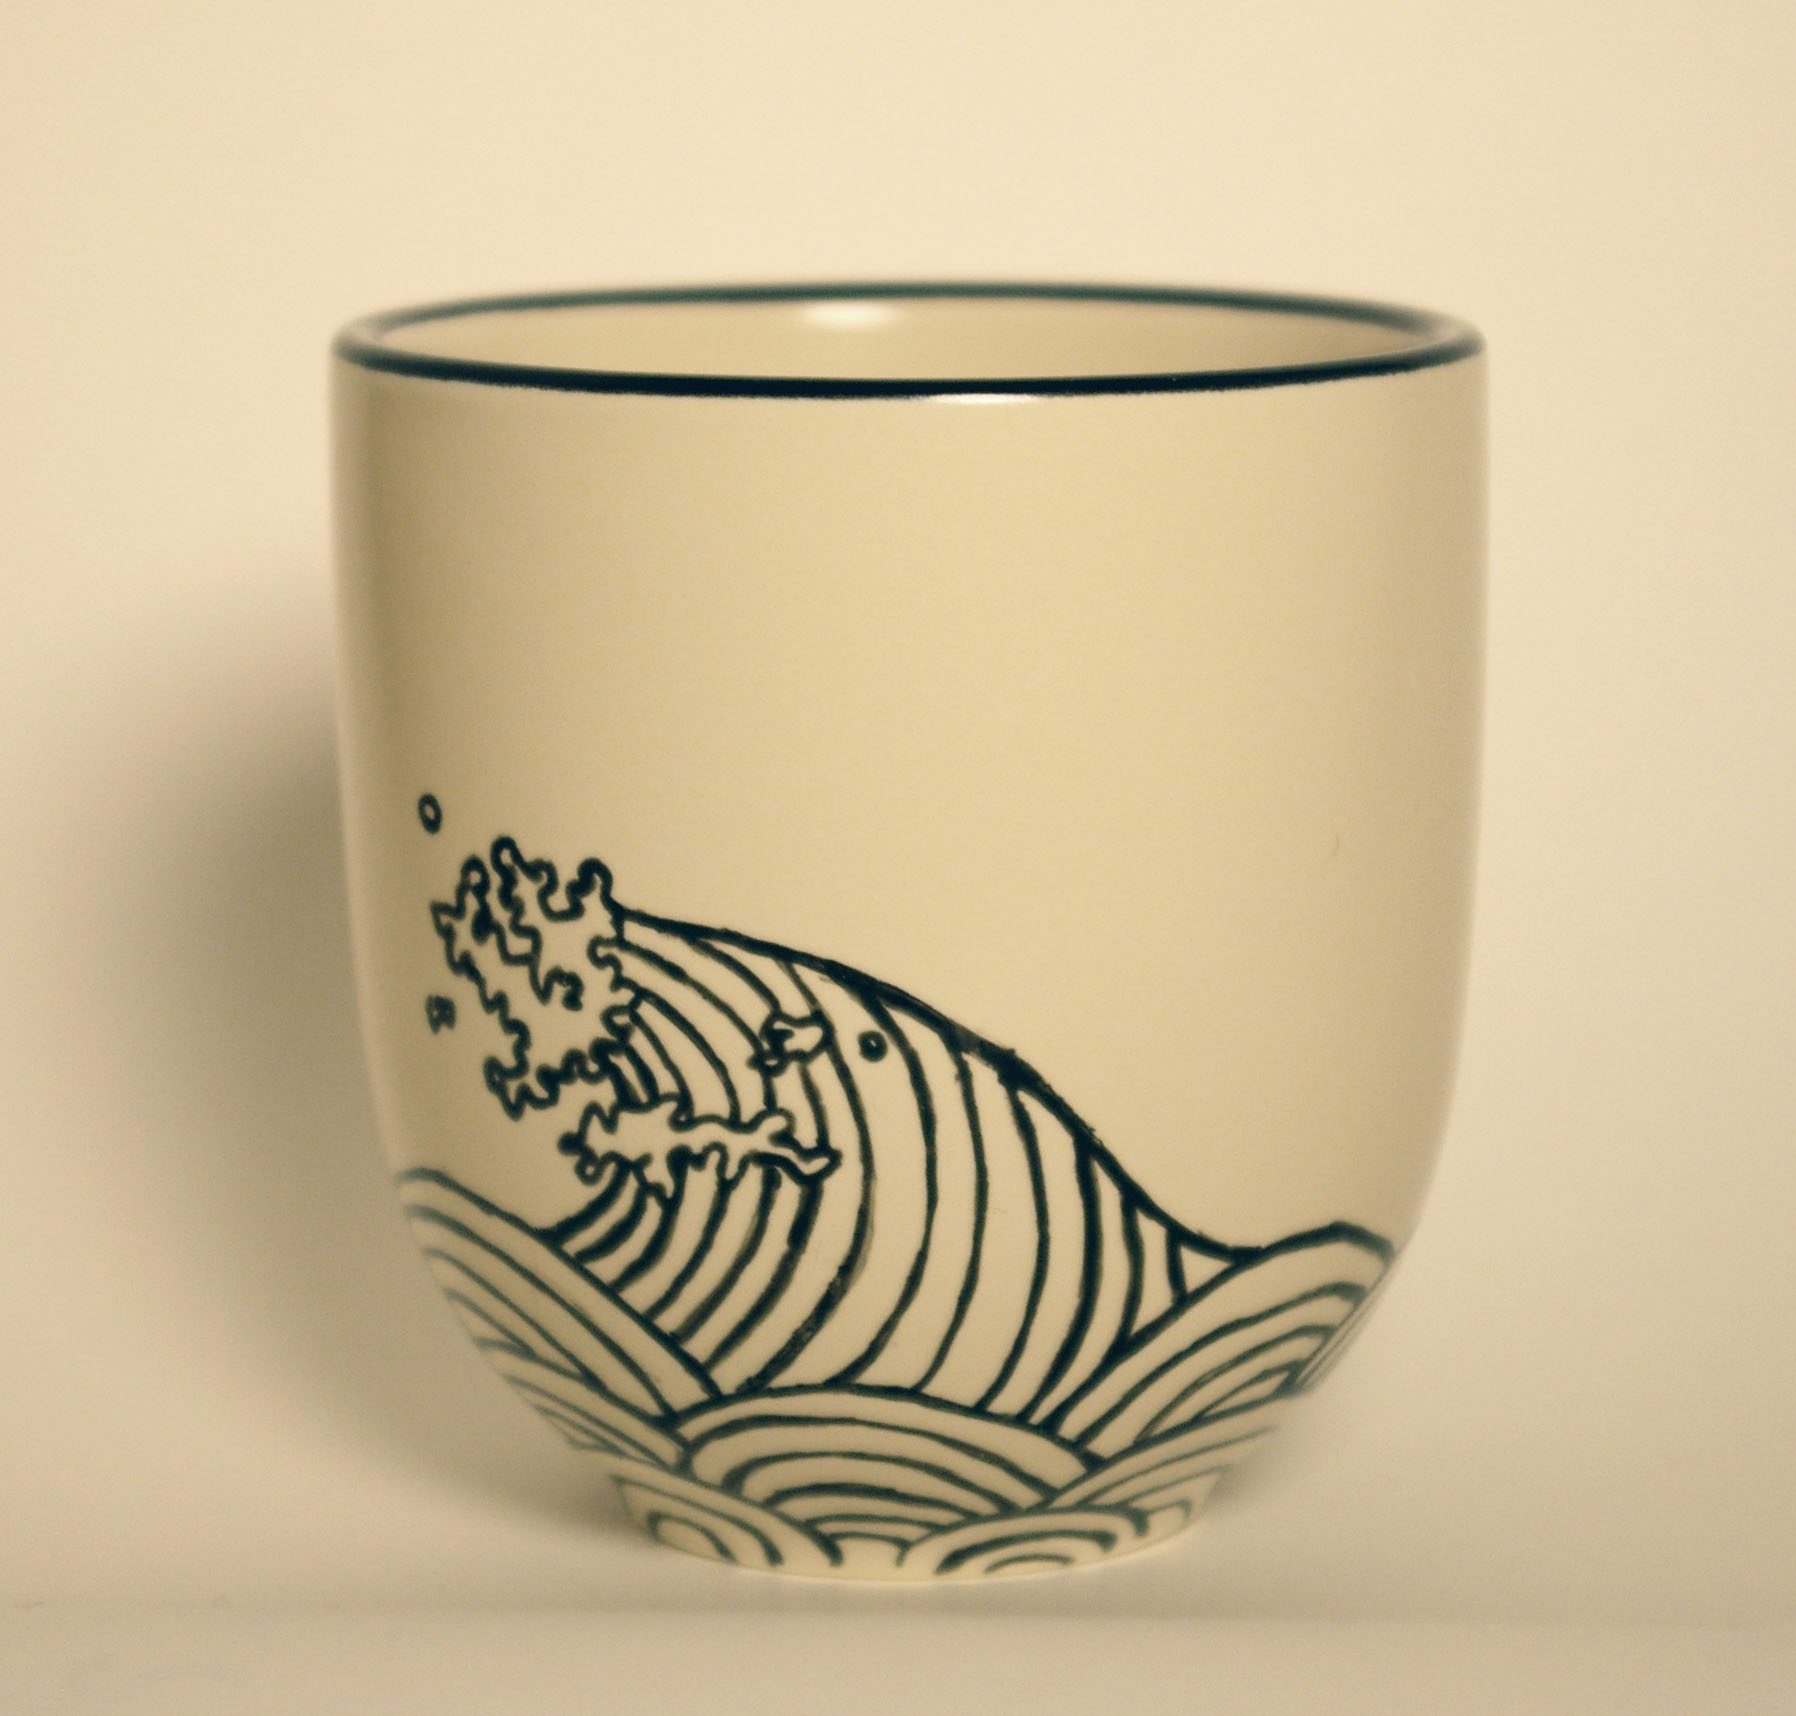
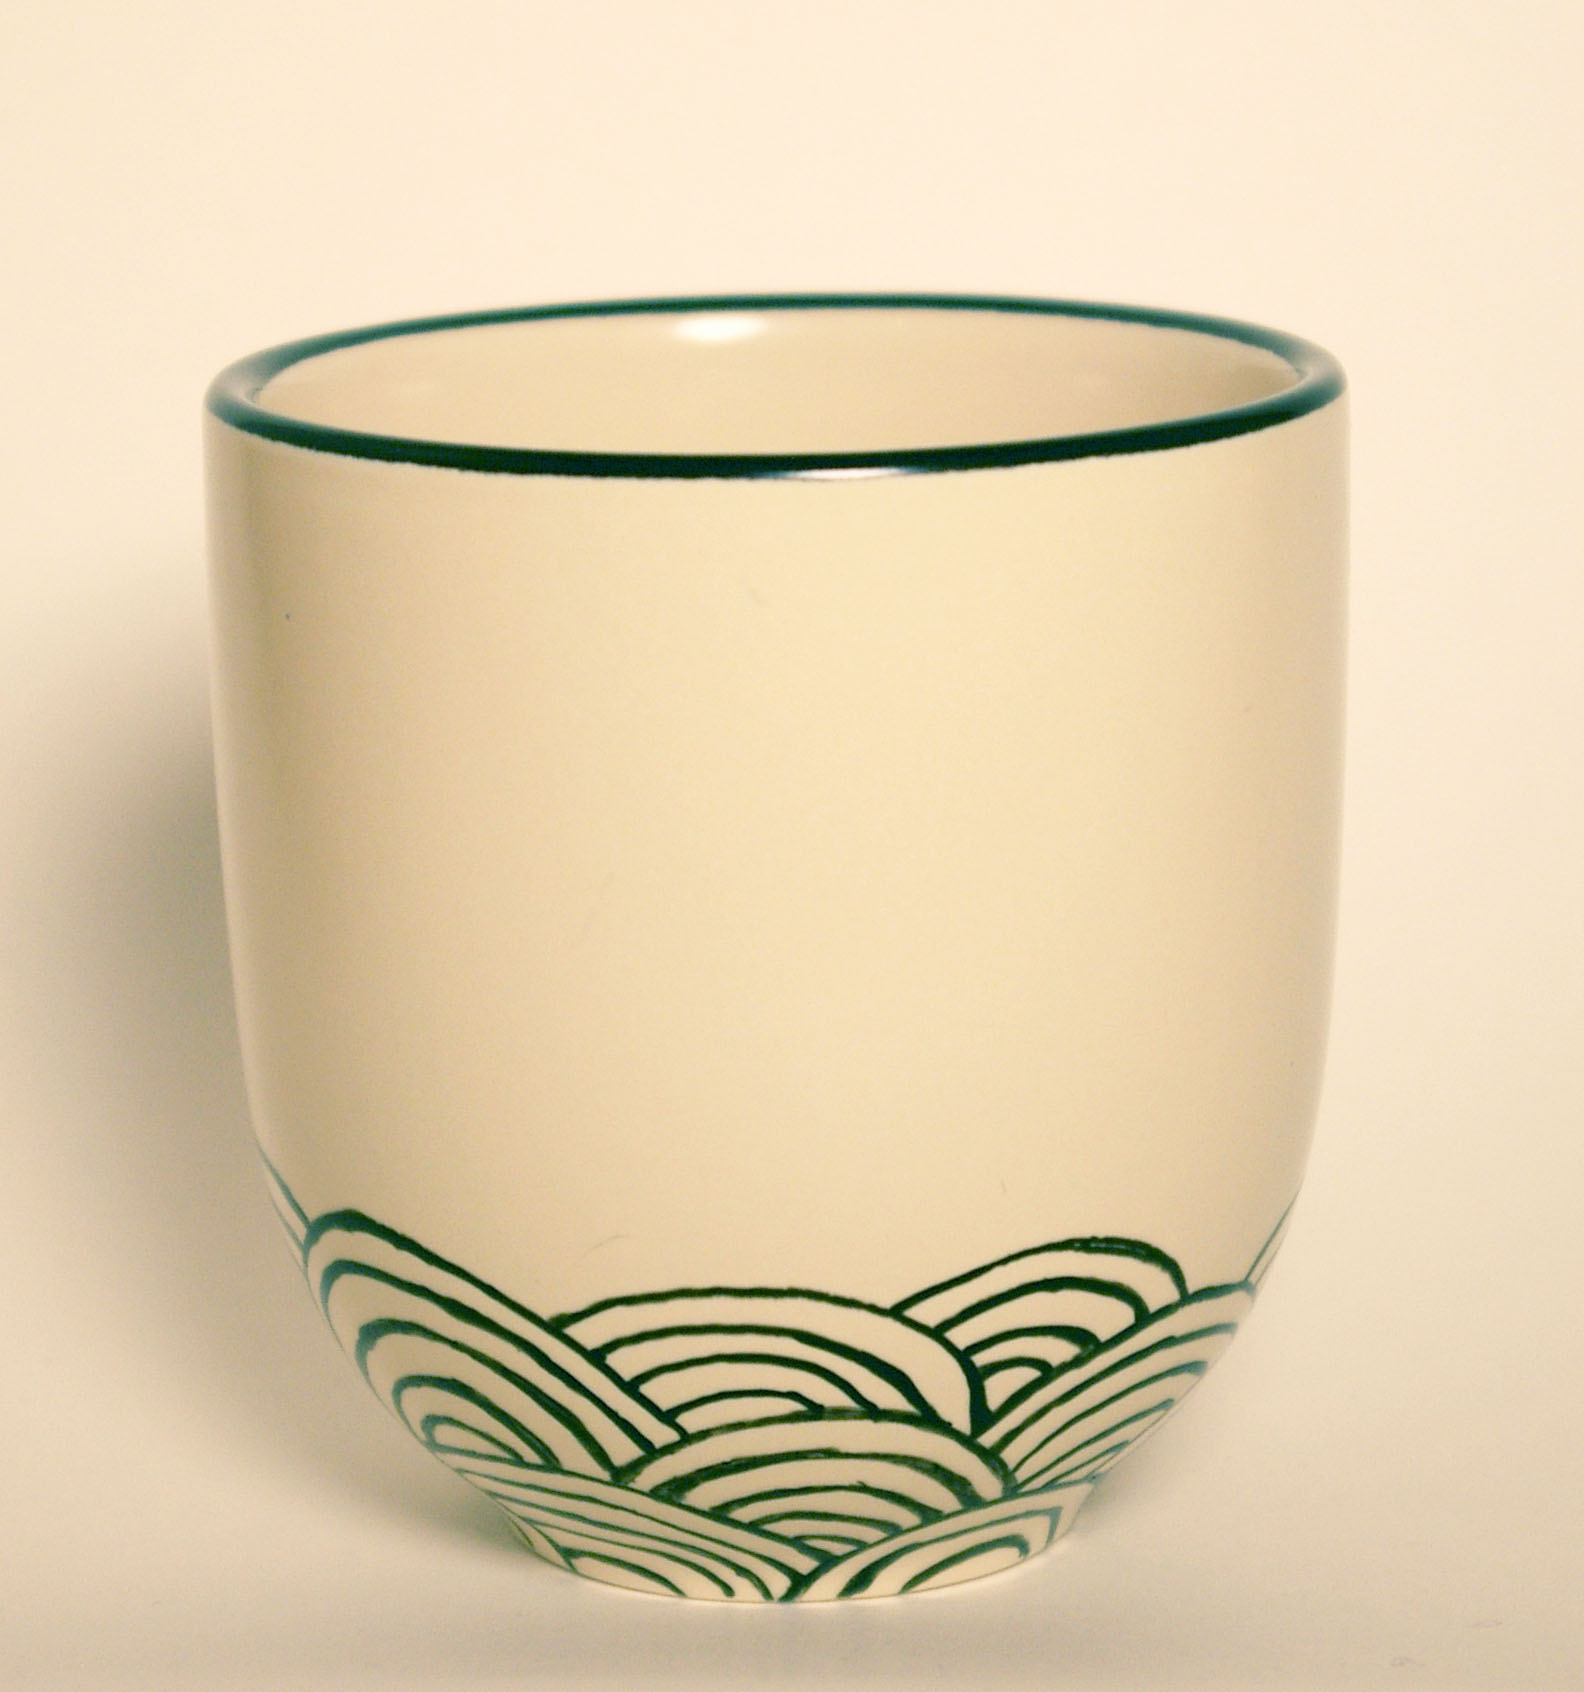
I really like doing this, although I think next time I'll get the actual paint instead of the paint pen.. The pen kept getting clogged and it was harder to get a nice consistent line with it. I'll post more about the paint after I get myself some.
So the second thing this post is about is that I finally started an Etsy store. It's kind of baren right now because I've been busy with school and stuff, but stuff will slowly trickle in as I have spare time to make stuff. I'm going to add these two mugs on it as well. :)
Here's a link to my little store:
chezlin.etsy.com
I still have a lot of work to do on it, but I thought it was time to show you all!