
A few days ago I posted about my cassette tape wallet and how it's held up over the past 10 months, and I promised a tutorial. Well here it is!
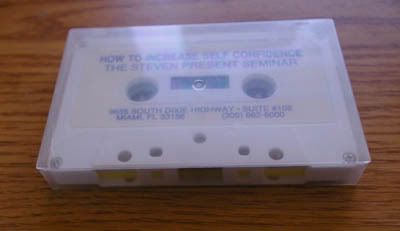
First you need to get your hands on a cassette tape. For my first wallet I already had those at my house, but for this one I ordered them from American Science and Surplus. These ones were screwed together, so it was super easy to take them apart. My first one was glued together, so I had to carefully pry the pieces apart with a flat head screw driver. If you have to separate your tape like this, be very careful. I cracked one in half because I was trying to rush it :( Some are glued up pretty good.
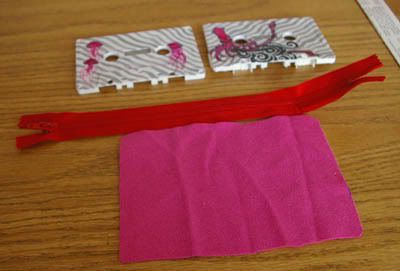
Here are the pieces together. The zipper is 9 inches and I just placed the two pieces of the tape over the inside fabric to see how big it had to be. Like so:
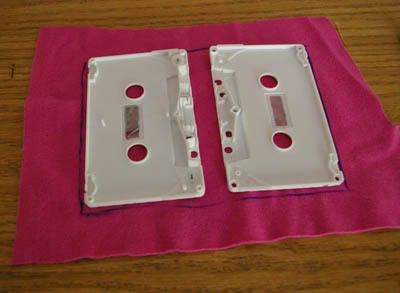
But you still might have to cut it down a little more than that, so it fits snug inside. I actually ended up using a piece of red felt for the inside rather than this hot pink jersey material. The felt was thicker and I like how the thicker fabric looked better than the thinner jersey.
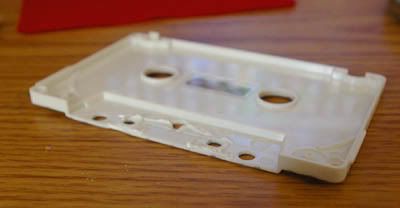
Take some pliers and go to town on the little pieces that stick up on the inside. Be careful as you get to the pieces close to the edge, you might end up taking a whole chunk of the outside of the tape as well. I almost did a couple of times! You could use a Dremel tool to do this part.. It's what I used for my first cassette tape wallet, but I wouldn't recommend going that route, because it resulted in many tiny burns all over my arms and whatnot from molten globs of plastic that shot at me from the Dremel.
Now here's the fun part.
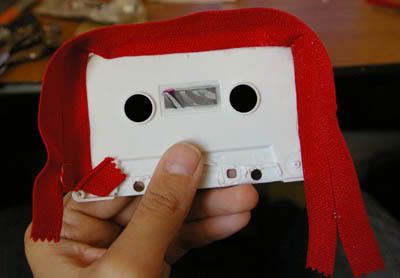
Take your zipper and slowly start to glue it to the inside of the tape. I use the glue E6000. I'm pretty much in love with that glue, it works so well. Some people have recommended using hot glue because it doesn't take as long, but I don't think it'd hold as long as the E6000 has.
Anyway, as you glue it in, only apply glue to about an inch and attach the zipper, and hold it for a few minutes. Make sure the zipper foot has enough room to easily zip and unzip. Rinse and repeat until you've made it all the way around. If you don't hold it down and wait for those few minutes, the zipper and tape will come apart and result in much frustration and glue-fingers. As you see here, I have quite a bit of zipper left over, so I just ended up making it go a little further onto the bottom of the tape. On my original tape the zipper ended up fitting perfectly, I don't know what the deal is with this one! You should do this step with the zipper unzipped or else you'll end up having to really carefully unzip the stupid thing when the glue hasn't cured all the way.

Here it is unzipped. Glue on the other side of the zipper to the other cassette tape half.
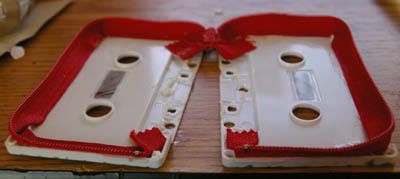
Here are the two sides all glued in.

Slather your glue of choice all over the inside of the tape and apply the inside fabric. Press it down with some pressure and hold for a minute or two, and that should be fine.
Now, I recommend not to touch this thing until at least 24 hours have past. If you don't you'll regret it because if you don't give it at least 24 hours for the glue to cure, it will probably fall apart a lot faster.
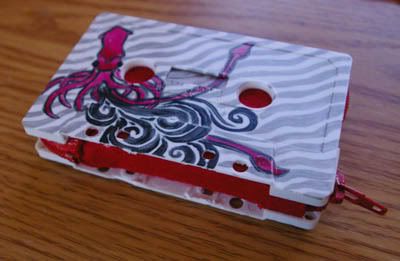
Here's the finished product. I painted it with enamel paints :)
I ended up giving this one to my little sister. She's had a good birthday weekend. If anyone has any questions about this tutorial, please feel free to ask!